Support – Jumpian

Support

You ask - we answer

Tutorials

Learn step-by-step how Jumpian is going to become your perfect companion for managing your everday life as a teacher. Besides the video tutorials, you find tips and tricks as well as answers on the most important questions. 

1. Einführung

Jumpian Neo kann auf zwei unterschiedlichen PC’s installiert und aktiviert werden. Mit Hilfe der Synchronisation können Sie Ihre Daten zusammenführen.

2. Einrichtung

Um die Synchronisation verwenden zu können, muss sie zunächst in den Einstellungen konfiguriert werden.

Auf dem Tab

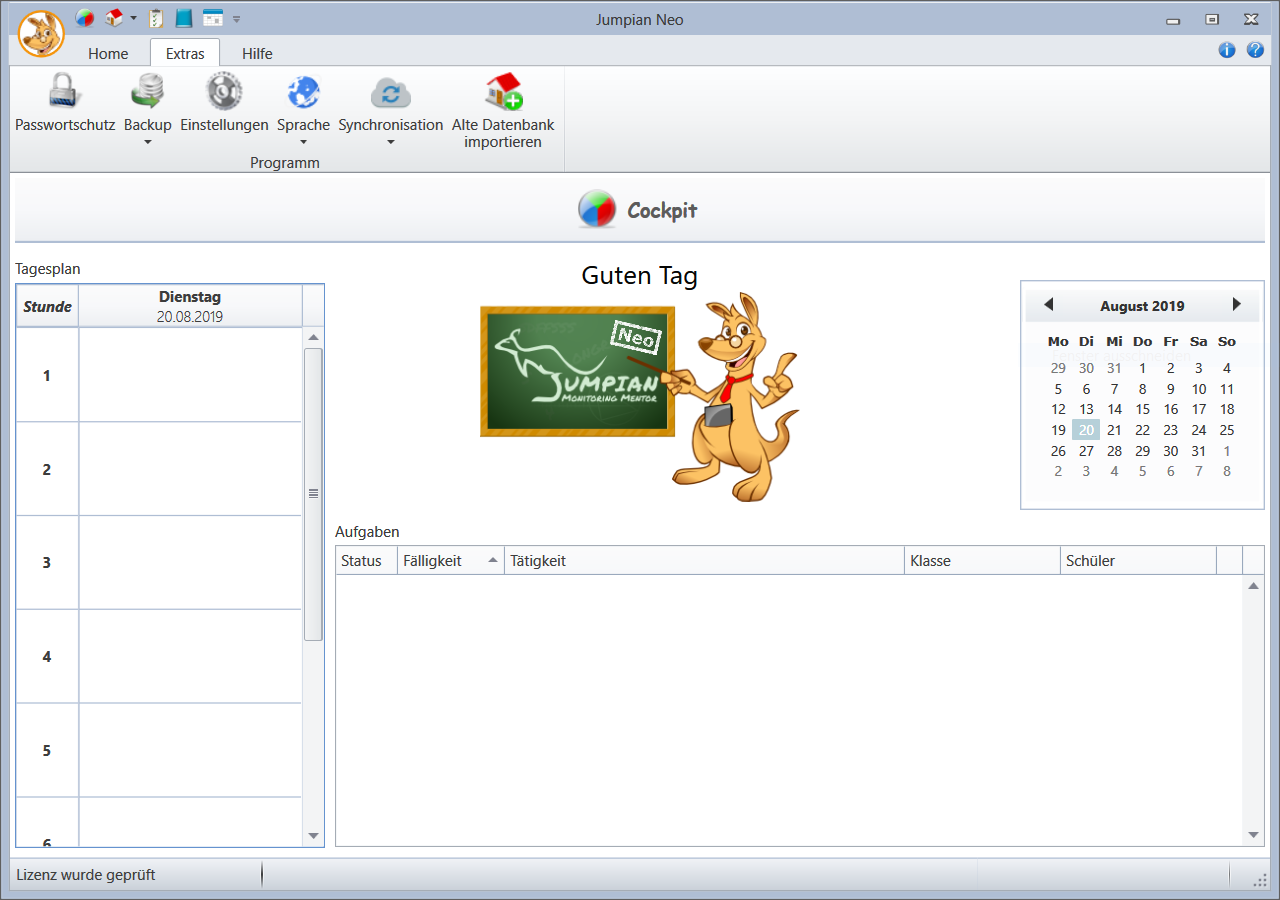
Wenn Sie auf den Button „Synchronisation“ klicken, öffnet sich folgendes Menü:

Synchronisationsmenü:

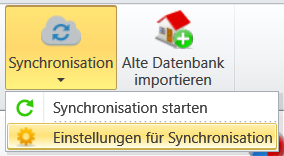
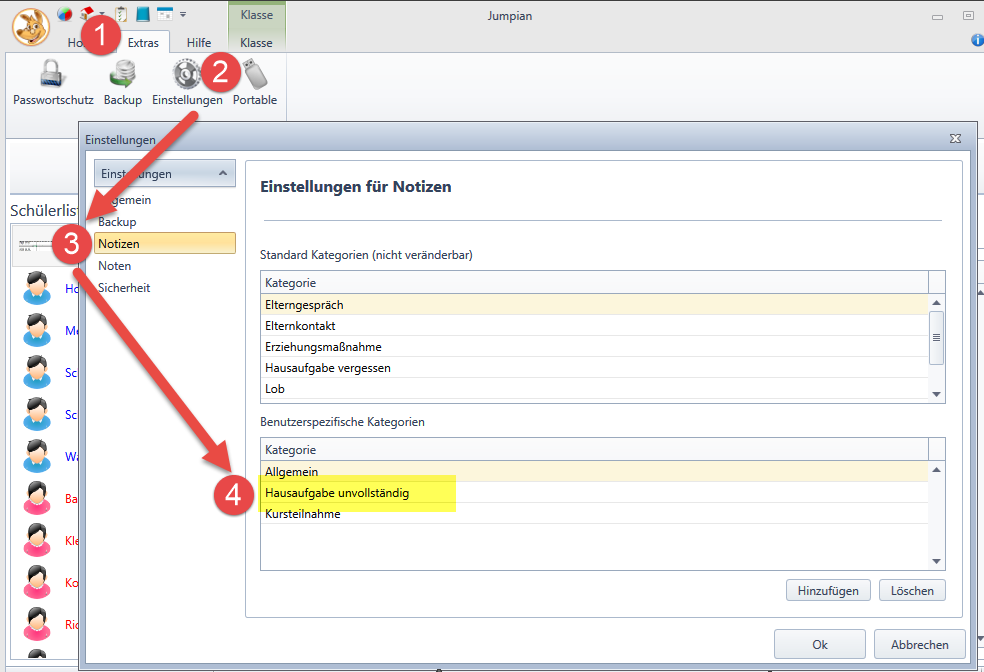
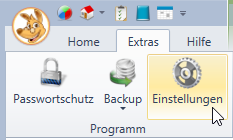
Klicken Sie auf „Einstellungen für Synchronisation“. Dann öffnen sich die Einstellungen für Jumpian, und es wird direkt die Kategorie „Synchronisation“ ausgewählt.

Die Kategorie

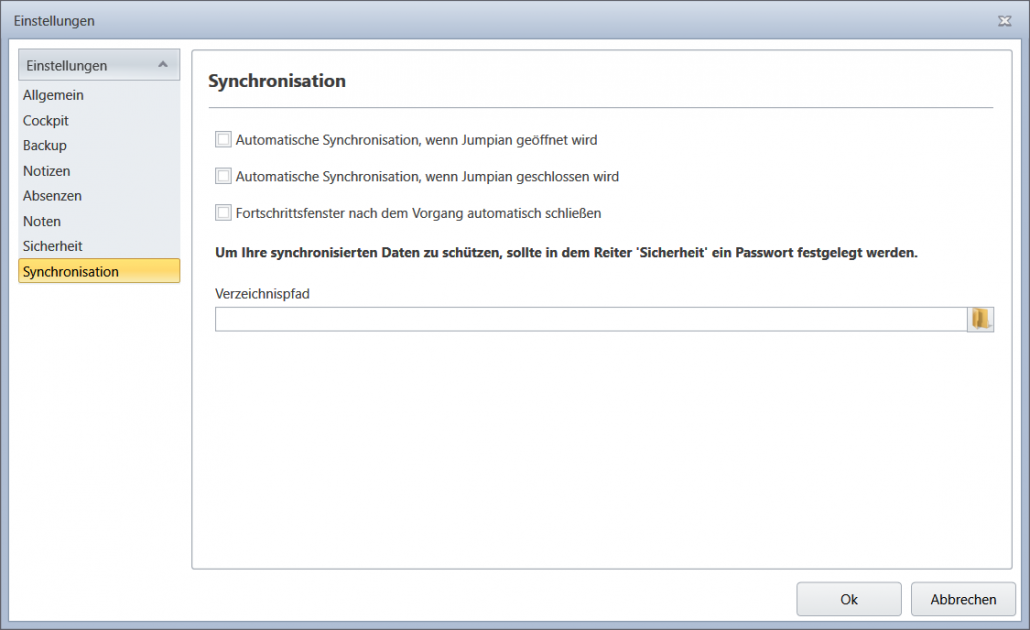
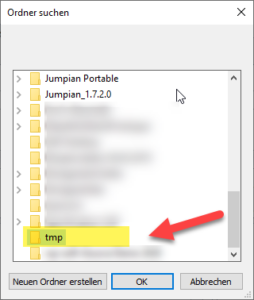
Hier können Sie den Pfad zum Synchronisations-Verzeichnis eingeben (unter „Verzeichnispfad“) oder über den Button rechts in der Zeile einen Verzeichnisauswahldialog öffnen.

Sie können jedes Verzeichnis auswählen, auf das Sie an diesem Rechner Zugriff haben und in dem Sie Schreibrechte besitzen. Das kann zum Beispiel ein Verzeichnis auf einem USB-Stick sein, oder ein Verzeichnis in einem Cloud-Dienst, z.B. OneDrive.
Achtung: Bei Verwendung von Cloud-Diensten muss zur erfolgreichen Synchronisation immer der Dienst mit seiner eigenen Synchronisation fertig sein. Sonst kommt es zu Fehlern. Sollte die Synchronisation nicht klappen, versuchen Sie es bitte zu einem späteren Zeitpunkt noch einmal.

Wenn Sie das erledigt haben, ist die Synchronisation eingerichtet. In der Titelleiste des Fensters erscheint dann ein zusätzliches grünes Pfeilsymbol. Über dieses können Sie die Synchronisation starten, genau so, wie es über den Button im Tab „Extras“ möglich ist.

Button

Die in diesem Abschnitt beschriebenen Schritte müssen Sie nun auch auf dem zweiten Rechner, mit dem Sie Ihre Daten synchronisieren möchten, durchführen. Das heißt, Sie wählen das Synchronisations-Verzeichnis in den Einstellungen zur Synchronisation aus. Falls das Verzeichnis auf einem USB-Stick liegt, muss dieser natürlich zunächst an diesem Rechner angeschlossen werden.

3. Verwendung

Jumpian führt Ihre Daten mit Hilfe des von Ihnen gewählten Synchronisations-Verzeichnisses zusammen. Dazu werden Ihre lokalen Daten mit den Daten im Synchronisations-Verzeichnis abgeglichen. Das heißt: Je nachdem, welche Information neuer ist, werden Daten in das Synchronisations-Verzeichnis übertragen oder von dort geholt.

Ein Beispiel
Sie haben Jumpian zu Hause auf Ihrem PC und auf dem Tablet, das Sie mit in die Schule nehmen, installiert und aktiviert. Die Frage, ob Demo-Daten erstellt werden sollen, haben Sie beide Male verneint. Beide Datenbanken seien also zunächst leer. Zur Synchronisation verwenden Sie einen USB-Stick.

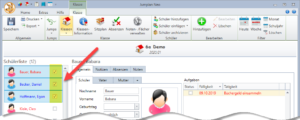
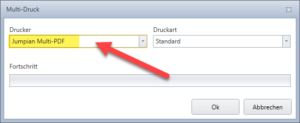
Sie schließen den USB-Stick an Ihren PC an. Nun legen Sie auf Ihrem PC die Klasse „5a“ an. Anschließend fügen Sie der Klasse Ihre Schüler hinzu. Sie starten die Synchronisation. Nachdem Sie das Fortschrittsfenster mit „OK“ geschlossen haben, sind Ihre Daten mit dem USB-Stick synchronisiert.

Die soeben neu hinzugefügten Daten fehlen auf Ihrem Tablet noch. Also werfen Sie nun den USB-Stick auf Ihrem PC aus, und schließen ihn am Tablet an. Dort starten Sie Jumpian und starten die Synchronisation. Nun finden Sie die auf Ihrem PC erstellte Klasse „5a“ mitsamt allen Schülern auch auf Ihrem Tablet.

Nun arbeiten Sie in der Schule ganz normal mit Ihrem Tablet weiter. Am Ende synchronisieren Sie Ihre Daten wieder. Danach können Sie den USB-Stick auf dem Tablet auswerfen und zu Hause am PC anschließen. Synchronisieren Sie dort erneut, werden die Daten, die Sie auf dem Tablet erstellt, geändert oder gelöscht haben, am PC ebenfalls entsprechend verändert.

Achtung! Jumpian übernimmt bei in Konflikt stehenden Änderungen immer nur die neueste Änderung. Ältere Informationen gehen verloren.
Ein Beispiel: In beiden Datenbanken sei eine Aufgabe angelegt. In dieser Aufgabe haben Sie notiert: „Büchergeld einsammeln“. Auf dem Tablet ändern Sie den Text dieser Aufgabe in „Büchergeld einsammeln und Hausaufgabe kontrollieren“. Anschließend starten Sie auf dem Tablet die Synchronisation. Nun editieren Sie auf dem PC dieselbe Aufgabe, die dort noch den Text „Büchergeld einsammeln“ enthält. Jedoch ändern Sie nun den Text zu „Büchergeld einsammeln (und Hausaufgabe kontrollieren)“. Anschließend starten Sie die Synchronisation. Dann wird nur die letzte Variante des Textes gespeichert. Die erste Variante auf dem Tablet ist verloren. Sobald sie das nächste Mal auf dem Tablet synchronisieren, wird dort also auch der Text „Büchergeld einsammeln (und Hausaufgabe kontrollieren)“ in der genannten Aufgabe erscheinen.

Um sicherzustellen, dass Sie immer mit den aktuellsten Daten arbeiten, haben wir die Option hinzugefügt, dass Jumpian beim Start oder Beenden automatisch eine Synchronsiation durchführen soll. Diese können Sie, wie in obigem Bild zu sehen, in den Einstellungen in der Kategorie „Synchronisation“ ändern.

Frequently asked questions and our answers

  1. Erstellen Sie ein Backup Ihrer alten Datenbank mit Jumpian 1.7.3.0.
  2. Klicken Sie in Jumpian Neo im Reiter „Extras“ auf „Alte Datenbank importieren“.
  3. Es öffnet sich ein neues Fenster.
    3.1. Wählen Sie in diesem Fenster unter 1) das Backup Ihrer alten Datenbank aus.
    3.2. Falls die alte Datenbank mit einem Passwort geschützt war, geben Sie unter 2) dieses Passwort ein.
    3.3. Wählen Sie unter 3) aus, in welchem Monat das Schuljahr beginnt.
  4. Klicken Sie zum Schluss auf „Importieren“.

Yes. You can use Jumpian with a Windows Tablet, if the Windows Pro Version (Surface Pro) is installed. There are no plans so far to make it available for iPad or Androids. Subscribe to our newsletter or follow us on facebook to not miss out on enhancements and innovations.

With the help of our new synchronisation function, you can switch simply between multiple devices.

Due to sensitive data and their protection, it does not exist an app-version of Jumpian so far.

No. You only need to deactivate Jumpian on your old computer (in the menu "Help - Activation") and activate Jumpian on your new one. By the way: Create a backup and use your data on your new computer. In our related video tutorial you are going to find a precise instruction.

Jumpian has been further developed. There is now the option to archive students and classes. The big advantage of this function is that archived students are hidden for the everday work. Never the less you have the option to access your data, e.g. print out a report to archived student.

Based on security, Jumpian allows to delete only archived students or classes. (To avoid deleting all data by mistake)

Short form

  1. Firstly, Class and students has to be archived
  2. After that classes or students can be deleted finally.

Detailed example for deleting a student

Select a student as desired and click with the right mouse key on "Archive student" => the student is going to be archived and not shown in the class view:

schuelerloeschen

In order to display archived students, a small symbol appears next to the student list, if archived students exist. If you click on it, all archived students are displayed (grey background)
[If you click on that small symbol again, the shown students disappear]

schueler archiviert

Delete or restore students: Click with the right mouse key on the archived student. You can finally delete or restore the data. (Tip: If you like to archive, delete or restore multiple students simultaneously, you need to click on the relevant students.)

schueler endgueltig loeschen

Detailed example for deleting a class

Under menu item "Class" click on the archived class => the class is going to be archived

klasse archivieren

You can find the archived class under "Class - Archive - 8a Demo"

(You can recognize an archived class by the symbol next to class name)

klasse archiviert

If you like to restore or delete a class, you only need to click on the menu " Class - restore class/ delete class finally". (Tip: If you delete a class, its students are also going to be deleted)

Jumpian supports you by maintaining an overview of forgotten homework: Therefore you can use the note function.

Short form

  1. Enter forgotten homework with category "Forgotten homework"
  2. Filtering by category "Forgotten homework" for an clear presentation
  3. Delete the filter to see the default view

Detailed example for displaying forgotten homework

In the example shown here, the selected student has already forgotten his homework twice. This information is fast and easy accessible due to limited number of entries.

HausaufgabeVergessen1

Assuming multiple entries were made by this student, the overview would be easily lost. The filter functions provides relief: Move the cursor over the field "Category" (1). Click on the list to select one or more filters. Here it is "Homework forgotten" (2+3)

Hausaufgabe Vergessen: Filterauswahl

After you adopted the changes, only notes with the corresponding categories are shown in the note tab. Here: All notes in category "Forgotten homework" (1). You have now all forgotten homework at a glance. The bottom sections show the current filter (2). Please do not forget to delete the filter, if you like to see all notes. The buttom next to the filtered category deletes it.

Hausaufgabe Vergessen: Kategorieanzeige

Jumpian offers moreover the option to create own categories, whereby you can refine the filter results. This is useful e.g. if you like to filter by forgotten homework in a specific subject (e.g. "Forgotten Homework - German"). In order to create new categories, open settings for notes under extras->settings->notes and add here an user-specific category. You can filter by this category or use it for "Jump"

Hausaufgabe Vergessen: Kategorie hinzufügen

In order to save annoying typing work, Jumpian provides to copy your already existing weekly plan to another week.

Short form

  1. Copy current week
  2. Select desired week
  3. Insert in selected week

Detailed example for copying a weekly plan into another week

In order to copy the weekly plan to a specifiv week, go to in Jumpian to that week, you like to copy. Click on "Copy week" (1). Afterwards switch to that week (2), where you like to insert the data.

Now you can insert your copied data into the desired week. Please note that the week you like to insert data has to be empty. If the week has entries, delete them to insert data from another week.

There are two options for inserting a week: "Insert week" and "Insert week(just title)". If you selected "Insert week(jus title)", notes are not copied, only titles. In case both options are greyed out, you either have not copied data from another week or the current selected week has entries. Please delete them. If no entries are visible, but both options are still greyed out, try to expand the timetable or switch from work week to complete week. Maybe a entry is hidden.

In order to move a student from one class into another class, open the class in which a student should be moved and select in the top section "Insert student". Afterwards click on "... from another class". You can now see a list of all students from the other classes. From that list you can select, which students you like to add. In addition, you can filter the list by classes. This simplifies the search for specific students.

Please note that notes and abscenses are not adopted, if you move a student into another class.

Sometimes not all notes, tasks or weekly planner entries are displayed. This can be due that some entries are not within your filter area. This can also be the case if you added a note or task and it seems like it did not saved the entry.

Displaying all notes or tasks

Your notes and tasks (globally, but also by specific students) can be filtered by specific criterias, in order to get a better overview. Have you setted one or more filters, you can only the see the entries, which match the filter. Active filters are shown on the bottom (1). You can also delete the filter there, so that you can see all entries.

Filter1


Displaying all weekly planner entries

In case not all weekly planner entries are displayed, check if you have selected the correct week. You can do this by taking a look at the data below weekdays. If it is not the right week, switch easily to the desired week by using the arrows.

FilterWochenplan2

If you still not able to see all entries, it may be that only the work week is shown or the number of visible hours are too limited.

Click at first on "Week" to make sure that the entire week is visible, not only the work week. Afterwards select "12" for hours. All entries must be shown.

FilterWochenplan

In order to get a better overview of your tasks and notes, Jumpian offers filter for displaying desired tasks and notes.

Where can I adjust my desired filters?

To select the wished filter, just move the cursor over the criteria, you like to filter by, in column title of the notes or in task table. The filter symbol is now visible.

FilterAnleitung2

Click on the filter symbol. A criteria specific selection window appears. Choose your desired filter and click afterwards on "Adopt". You can choose multiple filter per criteria or multiple criteria for a filter.

FilterAnleitung1

Please do not forget to delete you filters at the end. Otherwise not all entries are visible. A detailed instructions can be found here.

What filters are available for tasks and notes?

The criterias you can filter your tasks by are status, due date, class and student.

Considering notes, you can filter by date, category, evaluation, class and student. How to use the filter function with notes for example to show forgotten homework of a student, can you read here .

Jumpian offers the option to adjust weighing and grouping to match the mark management your personal requirements perfectly. This allows you to create groups and within groups areas, which are assigned to a specific work. Afterwards the median of the areas and groups are created. From this marks is the total mark calculated. However, you can work completely without groups and areas. Calculate every single test or work with division in areas. Just as you wish. Of course it is possible to weigh the single tests, areas and group differently.

A detailed instruction with calculation example (division of your subject in groups and areas, as well as median calculation of the total mark) are provided
here.

If you are at the beginning of a new school year and can not add abscences or mark, it may be that the wrong start month is saved. Jumpian thinks that you are still in the old school year.

By default, the first month of school year is september in Jumpian. Starts the new school year in a different month at your school, you can change this easy and fast.

Select in the bottom menu "Extras" and then "Settings".

Auswahl

The window "Allgemeine Einstellungen" appears. You can see here the drop-down-menu with the start month of the school year. Confirm your changes of the settings with the "OK"-Button, which is located at the right bottom corner of the window.

Einstellungen

All right? If not, please contact us! Ask question

Version history

Hier finden Sie Informationen zu allen Jumpian Neo Versionen.

(21.02.2024)

Neu in Jumpian Neo:

  • Fix: Wochenplaner Zeilenumbrüche

(07.12.2023)

Neu in Jumpian Neo:

  • .NET 4.5.2 => .NET 4.8
  • Hyperlink in Wochenplanereintrag nun anklickbar.

(24.01.2023)

Neu in Jumpian Neo:

  • (Fernwartung) Mikogo gegen Rustdesk ausgetauscht.
  • Option zur Unterstützung bei der Fehlersuche hinzugefügt. (Einstellungen -> Support -> Fehlerbehebung)
  • Fix: Anzeige für die Kalenderwoche im Wochenplaner.

(11.03.2022)

Neu in Jumpian Neo:

  • Schülerwechsel in Details zur Jahres/Halbjahres-Zeugnisnote vereinfacht.
  • (Corona) Testnachweise können über einen Jump hinzugefügt werden. Sichtbar sind diese in den Notizen.
  • Die Rolle Praktikumsbetrieb wurde hinzugefügt.
  • Fix: Geschlechterneutrale Schüler sind wieder möglich.
  • Fix: Schuljahr wird nach einer Änderung des Start/Ende-Datums sofort aktuallisiert. Kein Neustart nötig.

(12.11.2020)

Neu in Jumpian Neo:

  • Fix: Multiprint Aufgaben

(28.10.2020)

Neu in Jumpian Neo:

  • Zuweisung von Start- und Endzeiten für die Stunden im Wochenplaner. (Aktivierung in den Optionen)

(15.10.2020)

Neu in Jumpian Neo:

  • Jumpian Multi-Pdf Report
  • Update der Online-Hilfe

(28.01.2020)

Neu in Jumpian Neo:

  • Notizen, die mit „neutral“ bewertet wurden, haben nun ein „o“-förmiges Symbol
  • In importierten Wochenplaner-Einträgen werden Klasse und Fach nun korrekt angezeigt.
  • Individuelle Reports des Wochenplaners werden korrekt gedruckt.
  • Die Textfelder zur Eingabe von Name und Vorname eines Schülers verlieren beim Tippen nicht länger den Fokus.

(09.12.2019)

Neu in Jumpian Neo:

  • Neues Feature: Anzeigen aller Zwischennoten im Notenschlüssel. Wenn zum Beispiel „Halbe Noten“ oder „+/- Noten (0,33)“ ausgewählt wurden, können danach im Optionen-Menü über „Alle Noten anzeigen“ alle Zwischennoten eingeblendet und editiert werden.
  • Neues Feature: Filtern der Einträge im Wochenplaner nach Schulklassen, Fächern oder einem benutzerdefinierten Text. Einträge, die nicht den Filterkriterien entsprechen, werden schraffiert dargestellt und nicht ausgedruckt. Außerdem können sie nicht verschoben oder editiert werden.
  • Backups werden nun korrekt validiert und wiederhergestellt.
  • Einträge im Wochenplaner werden nun automatisch gespeichert.
  • Änderung: Die Noten der Sekundarstufe II werden nun zweistellig angezeigt.
  • Neue Optionen in der Kategorie „Allgemein“: Unterschriftenzeile auf Reports anzeigen. Es kann festgelegt werden, ob die Unterschriftenzeile angezeigt werden soll, wie die Zeile beschriftet wird und welcher Text darunter steht.
  • Neue Optionen-Kategorie für den Wochenplaner hinzugefügt: Hier kann ausgewählt werden, ob neue Einträge immer mit der Titelzeile „Klasse – Fach“ oder „Benutzerdefinierter Text“ erstellt werden sollen.

(16.09.2019)

Neu in Jumpian Neo:

  • Fix: Kopieren & Einfügen im Wochenplaner

(12.09.2019)

Neu in Jumpian Neo:

  • Fix: Import von Altdaten

(20.08.2019)

Neu in Jumpian Neo:

  •  Die neue Datenbank ist schneller und bietet eine bessere Verschlüsselung an.
  • Jumpian Portable wird durch das Synchronisations-Feature ersetzt: Jumpian Neo kann auf verschiedenen PC’s benutzt werden. Mit Hilfe eines gemeinsam genutzten Verzeichnisses werden die Daten zusammengeführt.
  • Passwortschutz: Die Daten im Synchronisations-Verzeichnis werden mit Ihrem Passwort geschützt.
  • Schneller Zugriff auf das Synchronisations-Feature: In der Titelleiste erscheint ein Shortcut für die Synchronisation in Form eines runden grünen Pfeils, sobald Sie das Synchronisations-Verzeichnis festgelegt haben.
  • Ein Backup Ihrer alten Datenbank kann in Jumpian Neo importiert und weiter verarbeitet werden.
  • Verbessertes Absenzen-System: Man wird die Fehlzeiten auf Minutenbasis (für z.B. Verspätungen), auf Tage- und auf Schulstundenbasis eingeben können. Die Jumps wurden entsprechen angepasst.
  • Keine vorgegebenen Schuljahre mehr: Künftig können Beginn und Ende des Schuljahres auf den Tag genau festgelegt werden. Ihre Auswahl wird gespeichert und automatisch beim Anlegen einer neuen Klasse wiederverwendet.
  • Die Sprache der Benutzeroberfläche von Jumpian Neo kann auf Deutsch oder Englisch eingestellt werden.
  • … und einige weitere kleinere Änderungen und Bugfixes.

Hier finden Sie Informationen zu der letzten Jumpian Version.

(10.08.2020)

  • The new school year was added.

See News: This is the last version of the 1.7 serie. from now on Jumpian Neo is available

Here können Sie Jumpian 1.7.4 herunterladen

Close Menu